Tuesday, February 24, 2015

Raise The Roof, Popov's in Da house!

    This time, I'll be talking about closing up the roof on the little trailer.  This was a particularly fun step because not only does it make the trailer seem that much more substantial, but it also feels a bit like closing a chapter.  The wiring, the ceiling, the trim installation;  all were contingent on access through the open roof.  Closing in the roof means (unless I really screwed up) that all of those things are in the rear view mirror.  It was also fun because Dan and Martha, my in laws, were up this weekend and as always, made getting things done just a little easier.  The kids are always glad to be kept occupied by GrandMar and as long as Kat has been my wife we have been keeping Popov busy with our projects.  For the uninitiated, GrandMar and Popov are Dan and Martha's grandparent names. As they have been a part of all of our family projects, it is fitting that they should be a part of the "Little Trailer Project".  The pictures below show the open roof ready to be closed in.

This picture shows the back of the forward cabinet with the wiring for the electrical outlets and reading light.


The blue box on the left contains the wiring for the fan / vent.  The one on the right contains the wiring for the interior dome light.  Further back are the wires splitting left and right for the exterior porch lights.


    The next step is cutting insulation to fit in each of the cavities between the framing.  I used two layers of 3/4" thick styrofoam sheets.  The two layers made it pretty easy to cut out for the wiring.  It was a fairly simple cut and fit process; matching angles and cutting around the obstacles.  The irritating part was all the tiny bits of styrofoam flying around and sticking to everything including me; I literally had to vacuum myself.

The insulation is installed and the wiring is marked where it goes through the spars.  Although the wires should be low enough that the staples will not reach them, I'll avoid those spots just in case.


     After The insulating is done, it's time to test the fit of the 1/8" masonite hardboard sub-skin.  I call it a sub-skin because eventually, it will be covered with an aluminum skin.  It must fit flush to the last spar (the hinge spar) and follow the seem of the camper sides and trim all the way forward.  To check the fit, I clamped it flush to the last spar, weighted the top, and pressed the front down.  After clamping the whole thing into place, I marked out the locations of the spars on the skin and drew lines indicating where all the framing will be.  

Here the masonite is clamped flush to the hinge spar.

You can see how the skin will need to be forced into shape.

With the top weighted and the front clamped down, I can mark the locations of the centers of the framing members (marked out on the blue tape).


     The next part requires some assistance and that is where Dan comes in.  We positioned the skin on the camper and made some reference marks so that we could place it without smearing the glue all over.  After a dry run placing the skin we were ready for glue.  A generous bead of glue was applied to the tops of all the framing members and we set the skin in place.  Once I was satisfied that we had it lined up just right, I stapled it down to the last spar, working out from the center stapling about every 3".  From there, we worked forward, one spar at a time; working out from the center line smoothing and compressing the skin as we went.  The 4'x8' sheet is about 5" shy of covering the whole top, so a piece was cut to fill in the remainder after we got the whole thing stapled down.

Glue.

More Glue.


Here she is with her sub- skin all stapled down, lookin' smooth.

Finally, the fan/vent hole is flush trimmed to the framed opening.

   This step makes the camper look more finished, but it also goes a long way to reinforcing its structure.  Tying all of the individual parts together with one seamless sheet means that they will all share stresses and that they all work together to make the whole assembly rigid.  This is now one very solid box.  
    Overnight, we got about 5" of new snow, and true to form, Martha took care of the catastrophe that was our post-breakfast kitchen, installed a gunk catching mat in the toaster oven and mended the puff ball on Kinsey's hat while Dan helped with the snow clean up.  As always, thank you D & M for all your help.  The snow brought with it something we haven't seen around here in quite some time: temperatures climbing into the 30's and it felt nearly tropical.  I mention this because it brings me to my final topic of discussion.  
     When we set out on our journey this summer, the little trailer will be pulled by my truck.  I love my truck and I really do not love child induced car filth. If you have children, you know what I mean.  In anticipation of a solid summer's worth of the girls trying to destroy my truck's interior, I got myself a Christmas gift: seat covers.  Until now, the weather has not permitted me to install them.  One look at the weather forecast confirmed that my window was narrow; the high tomorrow is a windy 12.  It was an absolutely beautiful day; sunny, calm , and 40 degrees.  It was really nice to just be outside comfortably.

Front before

Rear before

Front after

Rear after
    While we are on the subject of the kids, I have one last thought to leave you with.  One of our goals for this trip is to have the girls participate wherever possible, and a part of that will be putting their thoughts into the blog.   By way of introduction to that idea I have suggested that they write a little something about their expectations of the upcoming trip and the trailer project.  Without further ado, I give you the first installment of "Kinsey's Korner"...

                                                    Kinsey's Korner
      I guarantee that we will have a great time on our cross country trip. I just know it. I say that we will have a good time because we will be all together as a whole family. Dad's not at work. Mom's not at work. Zoe's not all the way down the hall in Tatham School, and me, I am not all the way in the first classroom doing Math work. I'm very excited about it. Maybe we'll see elephants, maybe we'll see red tailed hawks, maybe we'll see scary legends or ones as sweet as a heart full of love.
But my, oh my, am I not surprised that my dad can build a trailer with just a little help. If you ask my opinion I would say that my dad is very, very talented. 


Tuesday, February 10, 2015

Finishing up the Trim... Finally

     Due to a ridiculously relentless onslaught of winter weather, the need to make progress on some other side projects, the usual things like work and bedtime stories, and the fact that I generally dislike the finishing parts of any project, the most recent step in "The Little Trailer Project" has taken what seems like forever to come to fruition.  The good news is that it is finally done; glued and screwed.  In "Trimming up the Trim" we discussed building the trims and left off at the point of putting a stain and finish on them.  After doing a final sanding and addressing any defects, I applied two coats of oil based black stain.  The black will give a sharp contrast to the natural wood color and match the other exterior components and trailer frame.

  
     This is how the finishing process began.  I cleaned up the shop, laid the trims out and stained them.  Next I brushed on the first coat of polyurethane...  I thought I could get away with doing it all in my shop with a brush.  I'm certain that some people can, but I am equally certain that I can't.  On that first coat I had drips and sags all over the place, so I decided to turn  them over and do all the back sealing coats with a brush and take them to work to spray the final coats on the fronts.  After some tedious scraping and sanding, I got the drips and sags smoothed out.  The finish coats went on uneventfully enough, but I did manage to get a few four letter words in there before it was over with.  The finish room is pretty cold this time of year, thus polyurethane takes longer than usual to dry.  Knowing this, I carefully touched one of the trims the day after I had sprayed on the final coat and found it dry.  Immediately thereafter, I walked across the room (to where air circulation was a little less) to the other piece and dragged my fingers across the surface leaving two nice hazy streaks right at what will be eye level on the camper.  Insert your favorite foul language here.  The shakers built furniture that was deliberately flawed because only God made things that were perfect and to try to do the same was above their station.  I have yet to build something that required the deliberate introduction of a flaw.  Hopefully, I'll be able to buff it out a bit.  In any case, The flawed trim belongs to the passenger side, so I have decided that that will be Kat's side of the bed.  
    Flawed or not, the trim is ready to install.  Before finishing, the trims were fit and biscuit slots were cut in the forward section to join them to the camper where I would be unable to get a screw in.  I had Kat help me with the actual installation as there is a fair amount to juggle and it's always good to have a hand when glue is involved.  After the trims were clamped in place and pilot holes were made, we took it all apart and started gluing.  

The first step was to fill the gutter between the camper side and the trailer frame with black silicone.

Next, a bead of glue is laid along the camper side about the height of the center of the trim piece.  

The same process is repeated for the rear trim.

Screws are driven through the inside of the camper wall, just above the floor, into the lower trims.
The lower trims are installed and a bead of glue has been laid for the curved upper trim.

Here you can see the biscuits in the lower trim and camper side.  The blue tape is just a guide for the glue placement.

Screws behind the forward cabinet

In the galley opening, I nailed the trim from the inside, and will fill the holes with color putty.  The tape allows me to mark where I want to shoot the nails.


I look pretty serious here, don't I?


Remember all those screw holes along the floor of the cabin?  A molding runs around the bottom edge of the wall to cover them.


Me and my lovely assistant sitting in our newly trimmed trailer.

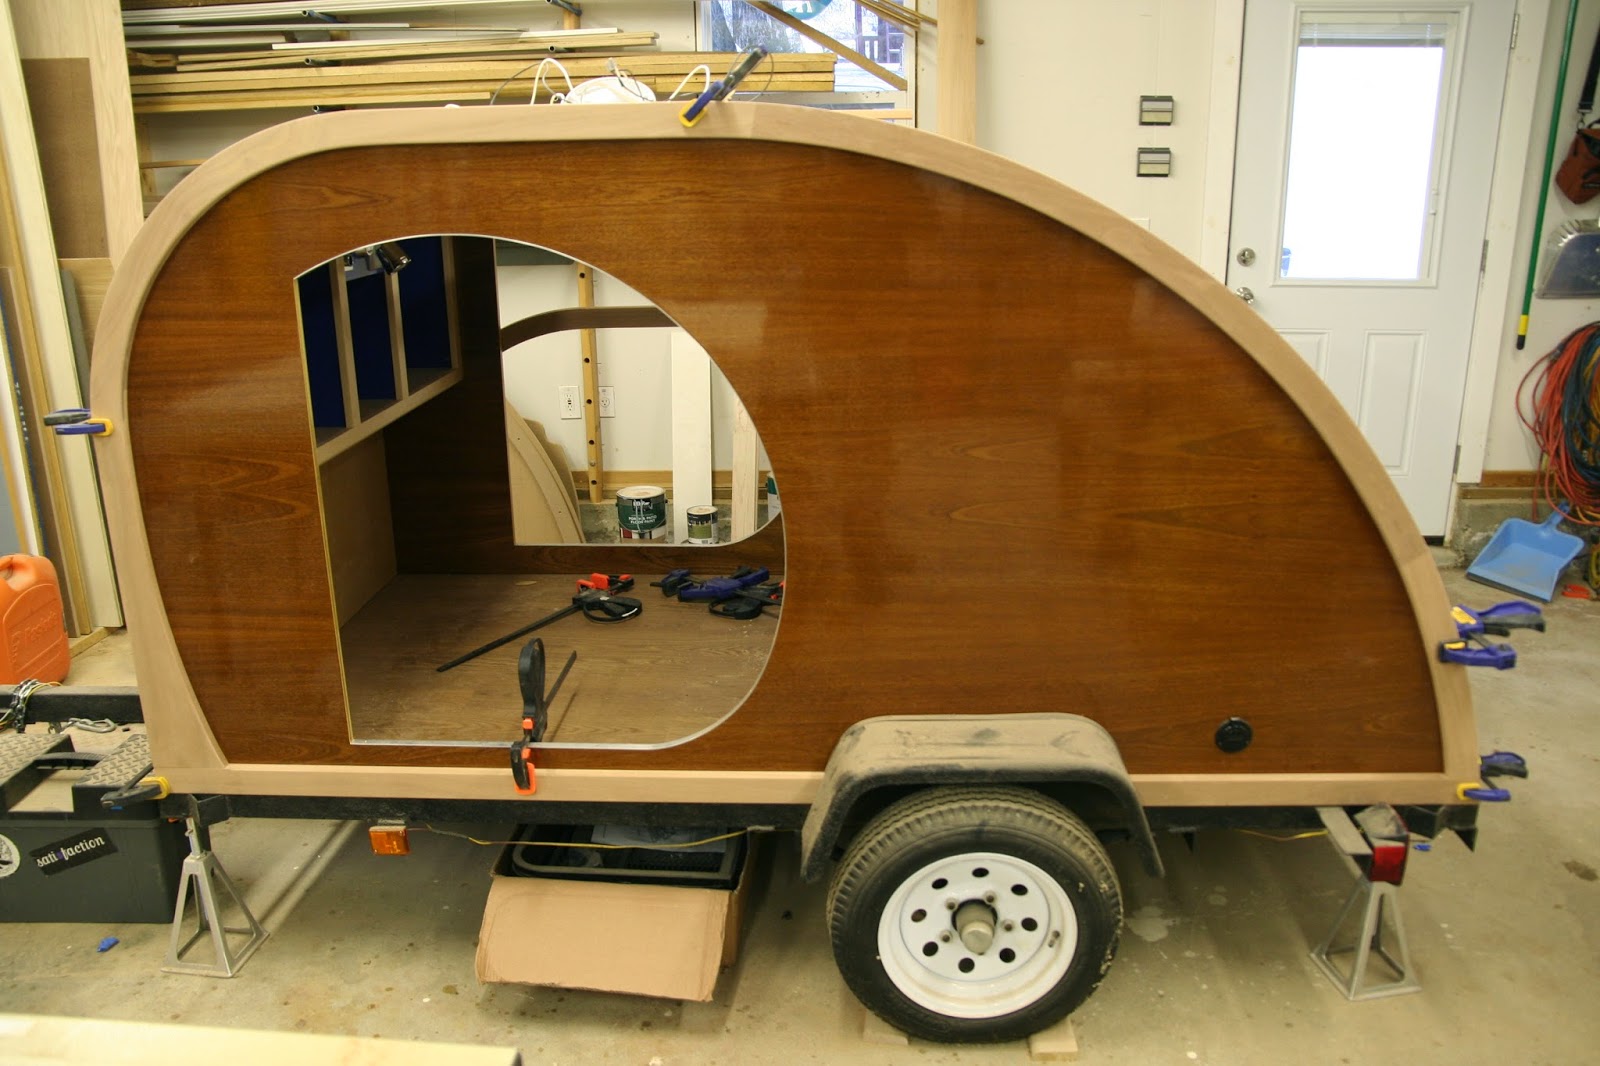
   Cute couple, huh?  I think the trailer is looking pretty snappy, too.  Although it is has a long way to go, the trims definitely give it a cleaner and more finished off look.  Now that the trims are on, I can get to work on insulating and closing in the roof.  It seems like an awfully short post for something that was so long in coming.  


Saturday, January 24, 2015

In the Mean Time...

    In my last post, I explained how I built the trims that will frame the camper sides, so now the big time-consuming task is to get them stained and polyurethaned.  When the big curved trims are laid out in the shop for finishing, it really limits what I can do in there, but there are a couple of details that I can go ahead and get squared away.  One is installing the exterior "porch" lights on the sides of the camper, and the other is to make a cover for the electrical junction box in the cabin.  Both are sort of fussy little projects that require minimal space and dust to complete.
    I bought the porch lights a long time ago when I was first trying to figure out how exactly the electrical system would work.  By the time I finally got around to preparing to install them, I realized that there were two problems with them; they are white (I have decided that everything on the exterior of the camper is to be wood  or black or silver, no white) and they have incandescent bulbs (all my other lights have more efficient LEDs).  So begins the saga of trying to rectify these two unacceptable attributes.  First, I searched for an LED version of the lights or something similar, in black, but could not find one that had the switch on it.  After deciding that what I was looking for did not exist, I opted to paint the cases and order LED cluster bulbs to replace the incandescent ones.  I received the LED bulbs, rigged up the lights to test them,.... they no work.  Luckily, Amazon is good about returning stuff, and after getting another set of LED cluster bulbs (exactly the same thing, different manufacturer) and testing them, they work fine.  I'm not sure they don't work a bit too well; I'll be the guy in the next campsite with the ridiculously bright light shining through the side of your tent.  At least I won't be the guy with the generator and television glow or the guy blaring "Credence Clearwater Revival's Greatest Hits" on repeat all night (Laura, you know what I'm talking about).  Too bright or not, incandescent bulb problem solved.  Now to make them black.  This too, turned out to be more difficult than it should have been.  I masked off the inside of the light, taped the switch and sprayed them with Krylon Fusion paint, specially formulated to bond to plastic.  Sounds great, right?  Well, in the process of installing and testing the lights, I found that the paint was really easy to scratch off.  This irritating discovery sent me back to the computer looking for an alternative again.  Literally one of the first things that came up on Amazon was a very similar looking, black, LED, light, with the switch on it; Where was this thing hiding the first time I looked for it !?!  The problem now, is that I have already drilled holes in my camper for the screws and the wires for the lights that I have.  Thoroughly annoyed, I decided to take the lights off, touch up the black, and spray them with a clear coat, as was suggested by a friend.  Hopefully the clear coat will be a tougher surface and lock the black down a little better.  If not, I may be revisiting this puzzle in the future.  For now, it will have to do.  I am done messing around with it.

The light masked off and ready to be painted (the first time)

Painted Black

The light installed, with LED bulb, and a shiny topcoat
The blue box is located just above the interior dome light.  Because of the low draw from the LEDs I was able to branch the exterior lights off of the dome light circuit.

     The task of covering the electrics in the forward bulkhead would be prove to give me far less trouble than the lights did.  I used a piece of 1/8" maple left over from the ceiling stock as the face of the cover.  After mitering a frame around the back of it I drilled holes through it, into the bulkhead.  Next, I installed posts in the bulkhead that would allow me to attach and detach the cover using cap screws.  Finally, I ran  a molding around the under side of the forward cabinet to give the whole assembly a finished look.

Here you can see the attachment posts and the mitered ends of the molding that will receive the cover panel.

The cover installed

Ta da! wiring, officially hidden.

     I know this episode of the "The Little Trailer Project" wasn't earth shattering excitement, but as the title of Primus's greatest hits album proclaims, "They can't all be zingers".  This is the reality of building anything.  There are some big steps that have a sort of instant gratification aspect to them, but mostly the end product is the accumulation  of lots of little chores, all of which require time and none of which is particularly noteworthy.  In fact, those "instant gratification" moments have many hours of not particularly noteworthy work behind them.  Those trims that I hope to get onto the camper as soon as possible, for example, will make a striking visual difference all at once on the day of installation.   That said, there will be countless hours of very boring and tedious sanding, staining, finishing and waiting, finishing and waiting, finishing and waiting, you get the picture, that will be undocumented and with any luck quickly forgotten by me.  This is all really just to say that, if you are thinking that this episode was lacking in "bippity, boppity, boo", I can assure you, it's far more interesting than "finishing and waiting".  Maybe my fairy godmother will visit me before my next post.

Wednesday, January 14, 2015

Trimming up the Trim

     In my last post I talked about how I lucked into the material used to build the ceiling in the sleeping cabin, and how this bit of serendipity resulted in that part of the build being virtually free.  This post is going to be something entirely different.  Pictured below are the three sapele boards I will need to build the trims that will frame the exterior sides of the camper.  At $6.55 bd/ft, they were far from free.  I have mentioned in previous posts that I am using a set of plans that I bought from "Big Woody Campers".  I have departed from the text quite often, but this is one case when I did so not due to some stylistic consideration or as a result of preferred methodology, but because I really feel this way is better.  Their trims are cut from two sheets of plywood, sanded smooth, and finished.  This is much quicker, easier and cheaper than what I decided to do.  It feel that solid wood will make a much better trim.  For one thing, seeing that plywood core every time I looked at the camper (trust me, I wouldn't be able to help it), would really bother me; aside from aesthetic concerns, having the plywood core exposed to the elements, albeit protected by a thick finish, would make me a bit nervous.  More importantly,  the trim is the most likely thing to get dings and nicks in it, and solid wood will be much better to repair than a veneer covered plywood.  So, now that I have revealed something of my somewhat fastidious and worrying nature, we might as well get into how I went about accommodating it.


     The first step was to make a template for the continuous curved trim that will run along the edge of the roofline.  To do this I flush trimmed a piece of 3/8" mdf to the camper side template, then scribing a line 2" in from that to make the inside shape. I also added a bit of a curving taper at the bottom of the forward part to reinforce the movement of the circular line.  The next phase is what I like to call the "head scratching, staring at stuff on the table, muttering, grumbling, and bitching" phase of this particular task.  This is the part where I have to figure out how to get my curvy trims out of my straight boards.  Using strips of cardboard cut to the widths of the boards I have to work with, it was a lengthy process of trial and error to work out the sizes of the blanks and at what angles they would have to join each other so that the curvature of the trim would fall within them once they were all joined together.  In the end I came up with a set of six cardboard templates which would overlap 2" at each joint to account for the 2" half lap joinery.  Now that the figuring was done it was time to mill up the boards and make the blanks.

Curved trim template on top of the cardboard blank templates.

Templates on the left, rough-cut blanks on the right.

Here the blanks have been flattened, milled to 3/4", and cut to match the templates.  You can see the cardboard template sandwiched between a pair (left and right) of blanks.
     Now that the pieces are all cut, it's time to make the joints.  I will be using a 2" half lap joint.  This basically means that I will remove 1/2 of the thickness of the board on opposite sides of the joint, 2" in from the end of each board.  Then they will be overlapped and glued.  This gives you a good surface to  face glue  and thus makes a very strong joint.  If my explanation is confusing, it's okay; I have pictures.

First, most of the waste is removed with a dado stack on the table saw.  It takes a few cuts, but the pieces are cut by simply running the butt end of the boards against the fence.

Here you can see that the dado stack makes a scored surface on the face of the cut and a burnt edge.

To clean up the joint and to fine tune the fit I use a wide flat router bit in the table.  Here you can see the difference in the quality of the surface produced by the dado stack compared to the router bit.
Once all the joints are cut they are dry-fitted and screwed together from the back side.  This allows me to assemble the whole trim blank for a final check before gluing.  The screws will also act as my clamps during the gluing process.
Here the blank has been dry-fit and is being checked to make sure that the template falls nicely within its edges.
         Now that all of my parts have been made, assembled, and checked against the trim template, it's  time to take it all apart and glue it back together.  I simply remove the screws, paint up the joint with glue, and screw it back together.  Because the screws go back into the same holes, the joints register themselves, more or less, automatically.  I allow the glue to dry overnight before moving on to the final shaping process.  The next day I start by sanding the assembled blank, front and back to the point that the entire surface  is evenly sanded and I can't feel any of the joints as I run my hand across them.  Next, I lay the template on top of the blank, trace it, and cut outside the line with a jig saw.  The final trimming is done with a flush trim router bit.  Due to the linear nature of wood grain, it is always tricky to rout curves.  There is always somewhere along that curve that the wood just wants to tear out and throw a big chunk of your workpiece across the room.  You can mitigate the tendency of the wood to tear out by carefully nibbling away at the material, running the router away from the cutting direction.  I say carefully because if you allow too much pressure the bit will grab and take off on you.  It just requires a little patience.

Rough trim blank glued up.

Sanded and ready to be cut out.

Template traced onto the blank.

In the process of cutting away the waste.

The next step is trimming.  Here you can see the trim on top, the template screwed to the bottom, and the half lap joint.


Trimming process.


The sad truth is that when all is said and done, there is as much wood on the floor of the shop as there is in the finished product.

           All of the grunt work is pretty much done.  I have neglected to mention the lower horizontal trims because they are  fairly basic; 2" wide boards, cut and fit, that's it.  I mention them now because they are integral to the next part of the trimming process; the fitting process.

Here you can see the trim clamped into place flush with the edge of the camper sides.

The bottom edge of the blue tape represents the top edge of the lower trim.  I use it as a reference to mark my trim piece for cutting.
It's a bit unwieldy, but this is how I trimmed the ends of the upper trim.
     Fine tuning the fit of the trim took a bit of back and forth; cutting a hair off the bottom, adjusting the angle a bit more or less.  After going to all that expense and spending all that time to make the trims, the last thing you want to do is cut it a little too short.  When all of the pieces are sitting just as they should, there are the finishing touches to attend to.  The bottom of the lower trim and the inside edge of the upper trim will get an 1/8" round to make the edge less susceptible to dents and dings while the outside edge of the upper trim will get a 1/16" round; just enough to break the sharp edge.  The top of the lower trim will be beveled away from the trailer to more easily shed water.

Junction of the forward section of the curved trim and lower trim

Rear and lower trim

     It may seem strange to deal with the trim before there is a proper roof on the thing and there are still so many parts of the camper, as yet unresolved,  but there is a reason for doing it now.  I don't want to put any fasteners through the trim once it's finished.  At this point I can still screw the trim to the camper from the inside where the screws will be hidden.  There will be more about that when I get to installing the trim, but before I can do that one more chore remains.... finishing...did I mention how much I love finishing?